Showing posts with label DIY. Show all posts

Thursday, March 31, 2016

The Little's Rooms Got Some Love

Last week I was thinking about how much creating I do for custom orders or for volunteer jobs. I spend a lot of creative energy on people outside of my family and so I suggested to David that it would nice to spend some creative energy on the littles. I had some ideas brewing and when he gave me the thumbs up, I went into full design mode. We settled on a gallery wall for each room plus curtains, hooks for their towels, shelves for each bedside and an art hanger for each little. I made a list of elements I wanted to include in each room.

  1. something sewn/fabric element
  2. woodcut element
  3. string art
  4. monograms
  5. photograph
  6. printable art/quote
  7. scripture verse
Then I narrowed down to specifics as to what that looked like. So for the girls' room it ended up like:
  1. kite
  2. heart (inspired by HEart by CC)
  3. crown
  4. cut out of foam board
  5. siblings picture
  6. "Dream Big" (source)
  7. I will add a verse to the heart woodcut at a later time

The boys room:
  1. deer head
  2. arrow
  3. sword
  4. cut out of foam board
  5. siblings picture
  6. fox
  7. I will add a verse to their arrow art later

David shopped, cut and stained wood during the daytime. He was in charge of the woodcuts, string art, shelves, towel hooks and art hangers. I painted the clothes pins (for the art hangers) and the frames plus rough cut out the fabric elements during the day. The rest of the projects were done in the evenings after the littles went to bed. That meant late bleary eyed nights, but I'm really happy with the results. Last night I planned the gallery walls, but putting them on the floor. I took pictures to give to David for hanging and while I took the children out on a playdate, David re-arranged the girls' room and hung all the elements we crafted. What a thrill it was to reveal it all to the littles!


The deer head was made from a pattern found here. I found the wood plaque at the thrift store and a with a bit of paint it made a great mount.

David cut this based on a few pictures I showed him on Pinterest. I didn't want to tell him exactly what to make, but I knew I wanted an arrow. It turned out great. His favourite piece.


Again, I asked for the sword, but I left David to do the style he wanted. He found a sword image on google, added a cross in the middle and enlarged it to make the template. Screws were an easier choice and he just went with it. I like it a lot!


The monogram "M"s I printed out on the computer, taped to foam board and cut out. I painted them and that's it! Super easy and a great and cheap monogram! We enlarged a photograph from our last family pictures in 2014. The same picture for both bedrooms. 


I thrifted and painted this cute frame and got the printable from here


Here's Malachi's art hanger in action (sorry for the dark picture). Just clothespins painted and glued to a board. Each little has one, though we haven't hung Hannah's yet. We are saving it until she is a bit older.


Michaels had these cutlery clothespins in a bin and I simply glued them onto this little board, also from Michaels. Cheap and funny, considering the boys are always thinking about food. This wasn't planned for, but added on a whim.


I found this wood pineapple at the thrift store. It was varnished and worn, but I saw its potential and snapped it up. I painted it and glued an oversized clothespin on it and it's adorable! My favourite piece in the girls' room!


David did the crown the same way as the sword and he did a great job!


The girls' monograms were done the same as the boys. I found the birdhouse and bird at Michaels and threw it in. 


The kite I made up as I went. I drew a pattern and did a basic quilting pattern on it. Then simply tied jersey bows onto a ribbon tail.


Each little got a shelf on their bed. They all needed a place to put water bottles and treasures etc. Here's Abby's in action. David made simply with two boards, painted white and attached right to the bed frames.


David made this based on a picture I showed him. Abby thinks it looks like a minecraft heart.


I used flat sheets from two of the littles' bed sets to make quick curtains. Not too difficult as I cut them in half, finished the two cut edges and voila! Curtains! I hate sewing curtains, but this wasn't too bad. We are exhausted, but happy with the results!


Wednesday, March 4, 2015

Grandma's Oily Blends

You've asked, cajoled and harassed (just kidding, kinda) and now my mom has graciously offered up her Young Living Essential Oil blend recipes.  Her only request is that if you choose to share them, please share the entire document in full. Her research on oils and safety is important to read and understand. 

From my mom...
Before I go any further, let me say that I am not a doctor or health care professional. Statements in this document have not been evaluated by the Food and Drug Administration. I am not here to treat, diagnose or cure any disease or medical condition. I am simply sharing with you as a Grandma. You should seek professional medical help for any serious disease, condition or injury. I assume no responsibility for the use or misuse of these recipes. I recommend using only Young Living therapeutic grade essential oils and to keep them out of reach of children.

Oils should not be used in the ears or eyes and are not recommended for internal use in children. If accidentally spilled or rubbed in the eyes or ears or injected or in case of a reaction to an essential oil dilute with a carrier oil such as olive oil NEVER water and seek medical attention if necessary. 

I highly recommend testing the single oils or blends on the skin such as the forearm before applying liberally.

You will often find more than one recipe below some just using GRAS (generally recognized as safe) for children essential oils and other blends using other time honoured (and in some cases ancient remedies) that might be used with more caution.

These therapeutic essential oils are generally recognized as safe (GRAS) for children

Chamomile
Lavender
Neroli
Sweet Orange Mandarin Geranium
Dill
Tea Tree (Melaleuca)
Rose
Olive
Sweet Almond
Coconut 

Essential Oils for Children over 2 years of age:

Tangerine
Rosemary
Lemon
Ginger (make sure to use only 1/3 of this though, or not as much as you use other oils as it is still quite “heavy” for kids) You can use other kinds of oils once they are 3 years old and above. You may also mix other types of oils with what’s written here as long as you do not use too much of them. Now, it’s time to start making your own therapeutic oils that you can use for the kids.

This is another list that I found of oils that are apparently safe for children

Bergamot
Cedarwood
Roman Chamomile
Cypress
Frankincense
Geranium
Ginger
Lavendar
Lemon
Marjoram
Melaleuca 
Orange
Rose Otto
Rosewood
Sandalwood
Thyme
Ylang Ylang

[Quotes from Surviving When Modern Medicine Fails: A definitive guide to essential oils that could save your life during a crisis, 2nd Edition/Scott A. Johnson.

Use peppermint, rosemary, and eucalyptus very cautiously on or diffused near children under age 5 and avoid wintergreen on or diffused near children under age 12. In the case of sensitive children, it may be necessary to avoid peppermint and eucalyptus up to age 10, though this is very rare. It is quite uncommon— thought to affect less than two percent of children— but peppermint, rosemary and eucalyptus may cause adverse reactions in very young children, including central nervous system problems, respiratory distress and toxicity, and this reaction can occur from inhalation only. Although the chance of these few essential oils causing harm is minute, it is important to be extra cautious when it comes to the health of children. Wintergreen contains methyl salicylate, which is very similar to aspirin. Ingesting as little as 2.5 ml can be extremely toxic to children, and fatalities have resulted after the ingestion of as little as 4 ml in young children. Wintergreen should be avoided by children under age 12 to prevent salicylate poisoning and serious adverse events. Do not apply any of these essential oils on or near a child’s face and avoid diffusing them near young children. This includes applying them on your own body in a place where they would be exposed to them. Use mild oils like copaiba, lavender, German chamomile, lemon, and frankincense instead. Avoid oral administration of essential oils with children under the age of three. Oral administration in children under the age of six should be limited to the mildest of essential oils and very small doses. Some essential oils are known to or may cause acute toxicity in children under the age of six if administered orally. Those recommended in this book that may cause acute toxicity include basil, cinnamon, clove, eucalyptus, oregano, peppermint, rosemary, melaleuca, thyme, and wintergreen.]

Vapor Rub Cream for Kids (ages 0-5)


1-1/2 cup organic solid coconut oil
4 tsp of beeswax pastilles

5 drops of Lemon
5 drops of Myrtle
5 drops of Lavender
5 drops Peace and Calming
5 drops of Frankincense

Recipe 2 (use with extra caution)
1-1/2 cup organic solid coconut oil
4 tsp of beeswax pastilles

18 drops of Raven, RC or Breathe Again
2 drops of Peppermint
2 drops of Lavender
3 drops Peace and Calming

In a double boiler melt coconut oil and beeswax on medium heat
Cool 5 minutes
Add essential oils stir well and empty into a class jar
Let sit 4 to 5 hours or overnight to become relatively solid
Apply to the child's chest, behind the ears and down the throat, below the nose and to the soles of his/her feet.
For children 6-12 you could increase drops of each oil to 8 or more as tolerated.

On a personal note: I LOVE my mom's Vapor Rub. We've had a crazy coughing season, but we rub this on chest, necks and feet and the coughing calms almost instantly.

(Click on pictures to enlarge)

Dragon Tamer (all labels designed by my sister)
 Dragon Tamer is another one of my favourites! This does such a great job!

Knight Time

Little Miss Mellow
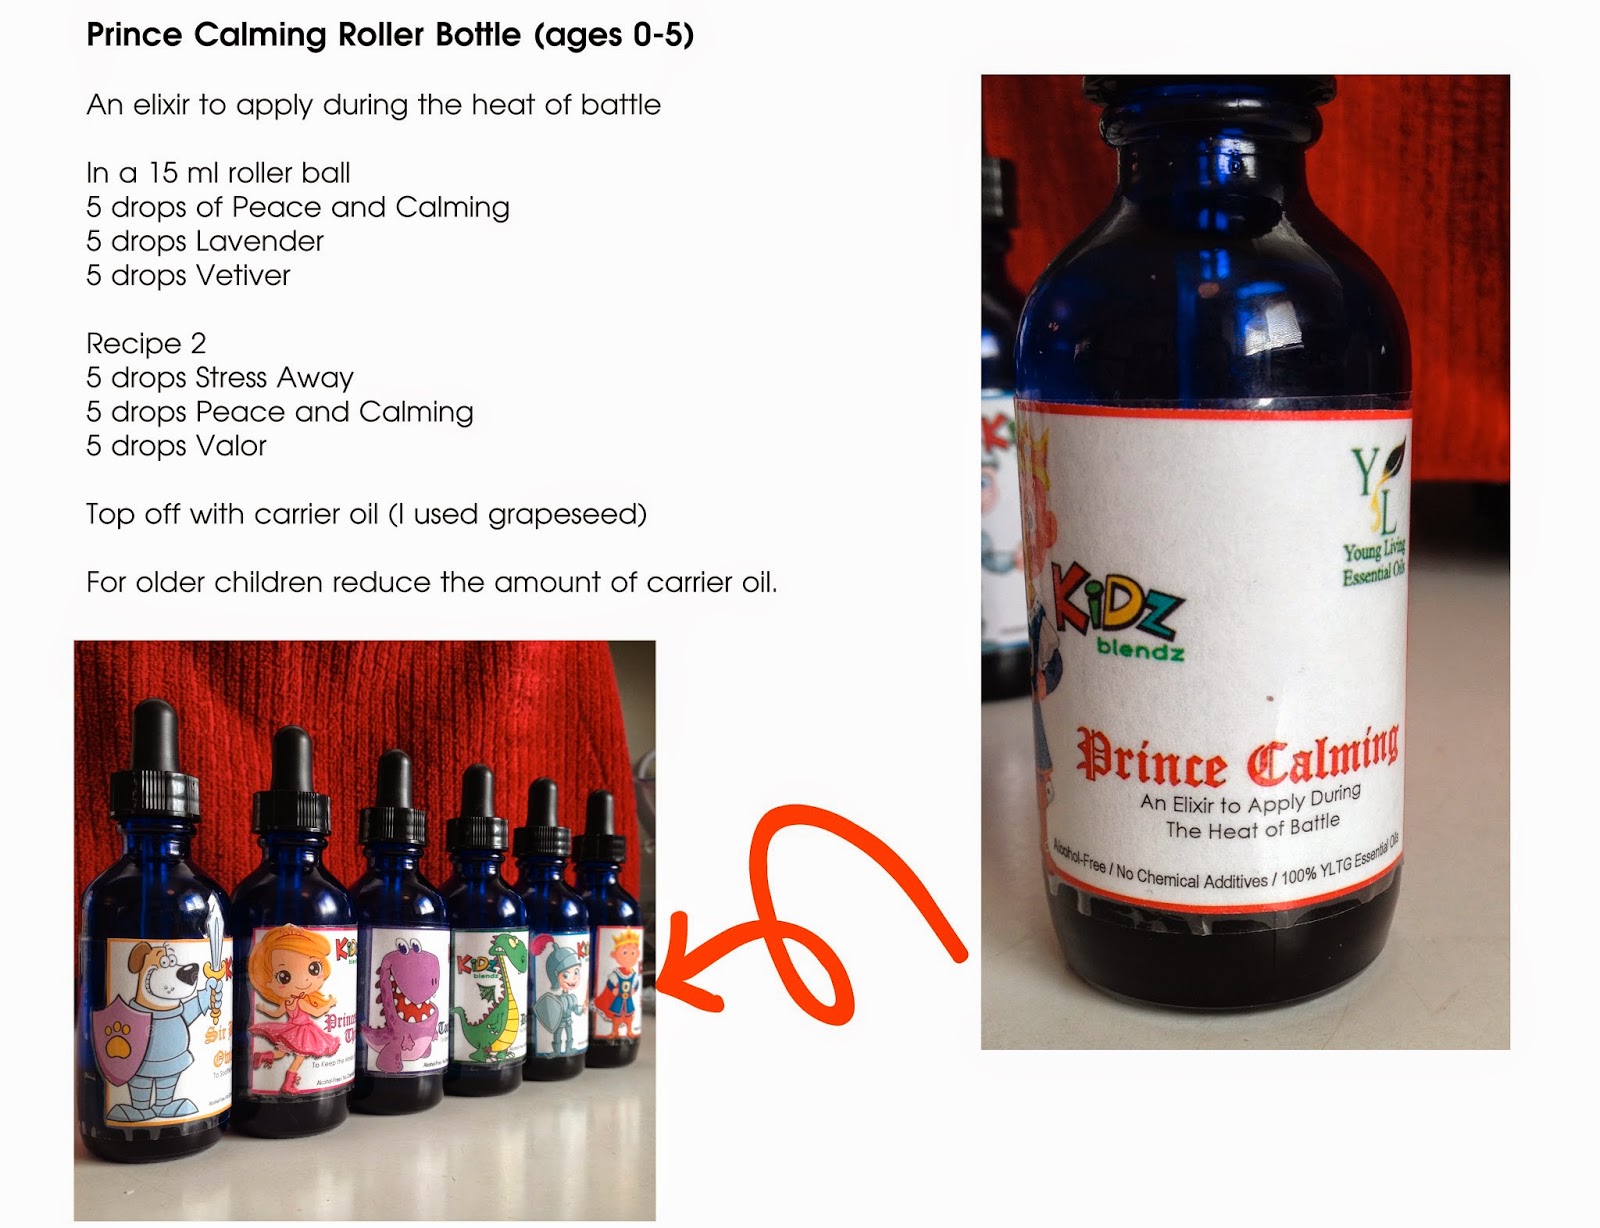
This is a new oil that mom blended and my sister designed for my Abby. She loves having her own calming "perfume" and we've already put it to good use. Now that Abby has her own roller bottle size, the boys are asking for Prince Calming in a roller bottle. 

Prince Calming
 My littles ask for this by name... all the time.

Sir Bow-Wow's Owie Buster

Princess Thinker-Belle
 Abby is better at remembering to put this on before school. 

Tooth No-Sore

Chest Infection

In a 15 ml bottle

3 drops Myrtle
3 drops Idaho Balsam
3 drops Copaiba
1 drops Frankincense
5 drops Ravintsara

Recipe 2 (use with extra caution)
15 ml bottle

10 drops Raven (or RC or Breathe Again but I used Raven)
2 drops Peppermint
3 drops Thieves

Top off with carrier oil (I used grapeseed oil).

Tummy Tamer

In a 30 ml roller bottle

1 drop Roman Chamomile
1 drop Lavender
1 drop Geranium

Top off with carrier oil (I used grapeseed oil)

Recipe 2
In a 15 ml bottle

15 drops Peppermint

Top off with carrier oil (I used grapeseed oil)

Can be applied clockwise Never counterclockwise) on the abdomen or applied on the soles of the feet AND ankles.

Recipe 3 (for older children 6 and up)
In a 15 ml bottle

23 drops Di-Gize
2 drops Peppermint

Top off with carrier oil (I used grapeseed oil)

Can be applied clockwise only on the abdomen with or without a warm towel or applied on the soles of the feet AND ankles.

Hot Cross Buns (Diaper Rash)

In a 15 ml bottle

1-2 drops Lavender
1 drop Melaleuca

Top off with carrier oil (I used grapeseed oil)

Recipe 2
In a 15 ml bottle

1 drop Lavender
1 drop Roman Chamomile
AND/or 1 drop Melaleuca

Top off with carrier oil (I used grapeseed oil)

Recipe 3 (Cream)

1/4 cup extra virgin olive oil
1/4 cup grapeseed oil
1/2 cup coconut oil (solid)
1/4 cup beeswax pellets

In a double boiler combine the first three ingredients and heat slowly until pellets melt. When partially cooled add essential oils

5 drops Lavender
5 drops Roman Chamomile

Or

4 drops Lavender
3 drops Roman Chamomile
3 drops Melaleuca

Use electric blender or whisk until thick and creamy.

I whipped it until silky smooth and thick. It is very luxurious and has a very mild scent. The beeswax gives it sticking power. Use it very sparingly it spreads like silk and goes a long way. It has a sheen to it, however if used sparingly does not feel greasy after a few minutes.

Perhaps another day I will share my mom's lotion recipes, too. They're awesome! Please remember to share all the research information and disclaimers if you're sharing this information.

Thanks, Mom!

PS If you'd rather not mix your own, Young Living has KidScents Blends available. We are blessed to have both and in my opinion, my sisters labels are way better. I haven't had them long enough to compare the effects. I've been so happy with my mom's that I still tend to go that route first.


Tuesday, February 25, 2014

Catching Up

I was looking through some pictures on my computer and realized that I hadn't shared a few things, so we'll call this a catch up post and then I'll share some of my latest news in another post.


  • I showed you a project in progress awhile back, but never showed you the finished project. Malachi turned three in November and received a super hero doll with a matching cape, super hero cuffs and mask. He was super thrilled and the cape continues to be one of his favourites. I designed my own pattern for the doll with tips I'd found online. My Micah might get one for his birthday in June...we'll see.


  •  I went to a Christmas party at the beginning of December and we had a gift exchange. I brought our home made vanilla coffee syrup. I bottled it in a Jones soda bottle and used some shrink wine toppers that David had left over from his wine making days. We were to bring two gifts, so I brought two and was happy to see that they were a desired gift and were "stolen" several times. I whipped up a label (re-worked last year's Christmas gift labels).


  • I also whipped up a small jar of sugar scrub for each lady. The peppermint smell in my kitchen was lovely.

  • I am so close to finishing a really big project...

I think I caught up the missed things, stay tuned for the latest ones.


Monday, November 11, 2013

Crafting Continues In the Rush of Life

I've made some choices in order to maintain sanity in our house. Mostly right now that means I lay down on the couch for 1-1.5 hours a day to rest during family quiet time and that means that my poor neglected blog has been left alone for some time. I am 7 weeks away from baby number 4 and I am tired. This doesn't mean that I have been idle in all areas of my life. David and I have begun and even finished some of our Christmas crafting, and I've been crocheting up a storm (well, for me anyway). My David has had a nice long weekend and been so generous with our family time, so today, I got a morning nap and get to spend quiet time here with you. Here's a little update on what we've been busy making. If you follow me on Instagram or Facebook you may have seen a few sneak peeks.


It started with some painting. Abby will be getting a thrifted jewelry box, painted and filled with handmade jewelry. I used this jewelry box for a while, but most of my necklaces are too long for it to work all that well. It will be a great size for Abby. I should mention that my David did most of the painting. I've had so much fun crafting with my husband!


Then we painted dowels for the all three littles' dance ribbon wands. They love dancing and our church has some nice ribbon wands, but we thought custom ones would be nice for our littles. We made two identical ones for each little, one for home and one for church. I will make drawstring bags for storage and transport. We used this tutorial here.


I also whipped up two scarves. My David and I love iconic Canadiana things, but the budget doesn't always allow that kind of indulgences. For example I love the Hudson's Bay Co. signature five point blanket stripes. The blankets themselves are super expensive, but to our dismay and surprise so were their scarves. We're talking $55 for a scarf!!!! Well, after a long visit at Michael's Arts & Crafts in their yarn department, we found the colours we were happy with and I got to work. David's scarf needed to be warm and functional, not just fashionable. He's not really an accessory kind of guy, so I settled on a tighter crochet stitch (HDC) with a small hook. This meant it took quite awhile and the middle section was quite long and boring. In the end, it turned out nice and cozy. Blocking made all the difference to the final project and just in case you were on the other side of the you-can't-block-acrylic-yarn fence, I am here to tell you that you can and it makes a huge difference. I looked it up on YouTube and I'm super happy with the results. I then made a quick (read loose stitch with large hook) infinity scarf for myself. I have plenty of warm scarves and was interested in another accessory more than a-keep-me-warm-on-the-coldest-days kind of scarf. It turns out to be quite warm anyway and it's cute.


I've also picked up my afghan that I started last fall and have made some progress. No promises as to when I'll finish, but I'm enjoying where it's going and I have hope that it will finish nicer than I expected due to my new found blocking knowledge.


I am now working on Malachi's birthday present which will be a super hero doll inspired by these, but re-worked with my own pattern. He will also get a matching cape, mask and wrist cuffs. His favourite thing to do these days is to dress up as Superman. He doesn't even really know who Superman is, but it's so cute! If you want to see him in action, here's a link to a cute video.


I have other handmade Christmas presents in mind. We'll visit those another day. In the meantime, it's been nice to stop in and say "hello". I've missed this space.

Thursday, August 23, 2012

A Sad Story With a Happy Ending

The week before we went to Alberta, we were generously offered a Little Tykes toddler car bed. We gladly accepted. We weren't able to connect in person prior to our leaving, so the bed (which is plastic) was left safely on the back deck. Our landlords moved it into their garage for us, but sadly a cat sprayed it first. If you've never smelled cat spray, it has a very strong ammonia smell and it doesn't smell pleasant at all. Well, we googled a solution  - a mixture of vinegar and baking soda and my David scrubbed the bed. He sent me down to do a smell test and it smelled like vinegar to me. A quick rinse and up we felt like we could move it upstairs. David ran to Walmart and picked up a mattress and sheet, then cut a new base board and voila! The littles went to bed, Malachi excited about his big boy bed, and we called it done. Well, at about 4:30 AM, we woke up to the sound of Abigail getting sick in the bathroom. After she was cleaned up we went to put her back to bed and realized how BAAAAAD the bedroom smelled of cat spray. EWWWW! Poor Malachi lost his bed to an outdoor time out. Abigail got sick again and it suddenly became a looooong morning. Back to Google and we decided to try a pet store product "guaranteed" to work. Bottle number one ran out before we could get rid of the smell. Half of bottle number two and we were ready to try again. UGH! It stunk up the bedroom... AGAIN! Bottle number two proved to be ineffective when we realized that the spray was inside the moulded plastic sides. We had to give up, though not sure what to do with the bed, we left it on the deck until we could come up with a solution. Our lovely landlady came up with a solution...


$15 worth of sand later and our littles LOVE IT!


In other news, we were generously offered another toddler bed by another friend and it's being delivered to us on Saturday! Hooray!

Monday, September 12, 2011

Checkin' In

Today is "Friday" - hooray! I am looking forward to having my David home for two days for sure! Here's a few things that I've been wanting to share:

  • I found a great tutorial for turning your favourite bar soap into a liquid body wash. I've told you how much I love Pumpkin soap and now I love it even more. These three bottles were made out of one bar of soap. It will last a lot longer this way.

  • This is how far David's gotten on the kitchen project, though he's working on it more this "weekend".

  • Have I mentioned that David works every weekend? His days off are Tuesday and Wednesday and this has now become our weekend... in case you were wondering.
  • Abby lives for Papa/daughter dates. The current deal is that they'll go on the next one when she is completely potty trained. This is taking way too long for her liking (mine too for that matter). Anyway, Abby will pick out her fanciest dress and shoes for her date. It's so cute. Here's Abby dressed up to get married - she loves to pretend she's getting married.


  • I have a unique name and because of that I don't often see my name on personalized items or in public places. I got the idea to google map my name. Apparently, there is a Coralee Drive, a Coralee Lane, two Coralee Avenues and a Coralee Loop. I then used the street view option to find a street sign, just so I could take a screenshot of it and use it. A little vain, I realize, but a little fun, too.
  • We found an online ink store in CANADA! that sells computer ink for super cheap. We used a dealfind voucher and got 4 cartridges of each color and black for under $30 (including shipping). We'll be ordering from them again... when we finally run out after this batch.
  • I've had the privilege of doing the ads for our ladies committee and it's been so fun. I'll have to show you some of them sometime.
  • When we changed to MagicJack, it was a good excuse for me to design new family contact cards. I had a lot of fun with these ones.


  • Hope you all have a great week. We're having an amazing warm fall so far, we could continue our summer list with no problems.